Candy Cookie Decorating & Presentation Ideas
 |
| Candy Cookie Decorating & Presentation Ideas |
The Joy of Cookie Decorating
Cookie decorating is more than just frosting and sprinkles. It’s an opportunity to express creativity and spread holiday cheer. Baking cookies alone is satisfying, but turning them into little works of art adds a special layer of joy. Whether you’re making cookies for a family gathering, a gift, or just to enjoy at home, the process is as delightful as the final product.
Decorating cookies invites experimentation. You might try a new color palette, add unique textures, or explore unexpected flavor combinations. Even small touches—like a sprinkle of edible glitter or a delicate icing swirl—can elevate a cookie from ordinary to memorable. For example, classic holiday favorites like candy cane cookies offer endless decorating possibilities, from red-and-white stripes to whimsical shapes. And while perfection is often celebrated online, the charm of handmade cookies lies in their little imperfections. They reflect personality, effort, and love.
Key Takeaways:
- Cookie decorating is about creativity, not perfection—play with color, texture, and design.
- Simple tools like piping bags, edible glitter, and cookie cutters can transform basic cookies into show-stoppers.
- Presentation enhances enjoyment—platters, gift boxes, and wreaths make cookies feel festive and special.
- Decorating is a shared experience; involve kids or friends to make it fun and memorable.
- Flavor, texture, and visual appeal should work together to create irresistible treats.
Essential Tools for Cookie Decorating
You don’t need a professional kitchen to create impressive cookies. A few key tools can make decorating easier, more precise, and more fun:
- Piping Bags and Tips – Piping allows for precision in creating lines, patterns, and small details. Round tips are great for outlining, star tips for adding texture.
- Spatulas and Scrapers – Even a butter knife can help smooth frosting and create clean edges.
- Cookie Cutters – Essential for consistent shapes. Stars, hearts, and classic shapes work well, but seasonal themes can really impress.
- Edible Markers – Perfect for adding details like faces, stripes, or small patterns.
- Sprinkles and Edible Glitter – Small additions can transform cookies visually. Don’t underestimate the power of sparkle.
- Food Coloring and Gels – A spectrum of colors makes cookies visually appealing. Try layering shades for more depth.
- Parchment Paper and Silicone Mats – Prevent sticking and make cleanup easier.
Pro Tip: Having a well-organized workspace saves frustration and allows you to focus on the fun part—decorating.
Decorating Techniques That Impress
Even if you’re not an experienced baker, simple techniques can produce beautiful cookies:
1. Royal Icing Designs
Royal icing is popular because it dries hard, making it perfect for intricate designs. Try:
Outlining shapes with precision
Flooding areas for smooth, even color
Adding dots, stripes, or lattice patterns for dimension
It’s okay if lines aren’t perfectly straight; handmade charm often comes through in subtle irregularities.
2. Dipped Cookies
Dipping cookies into chocolate or candy melts creates a polished look. Experiment with:
- Half-dipped cookies for a modern twist
- Contrasting drizzle patterns for visual texture
- Sprinkles added immediately for sparkle
3. Layering Colors
Layering adds visual interest and sophistication. Some ideas:
- Base coat of icing, then dry before adding detail colors
- Ombre effects by gradually blending two shades
- Luster dust or edible glitter between layers for shimmer
4. Playing With Texture
Texture creates visual and sensory appeal. Try:
- Using a fork to create ridges in frosting
- Adding coarse sugar or crushed candy for crunch
- Piping small peaks or rosettes for dimension
Fun Themes for Cookies
Themes give cookies personality and make them memorable. You can go classic, whimsical, or minimalist, depending on the mood:
Classic Holiday
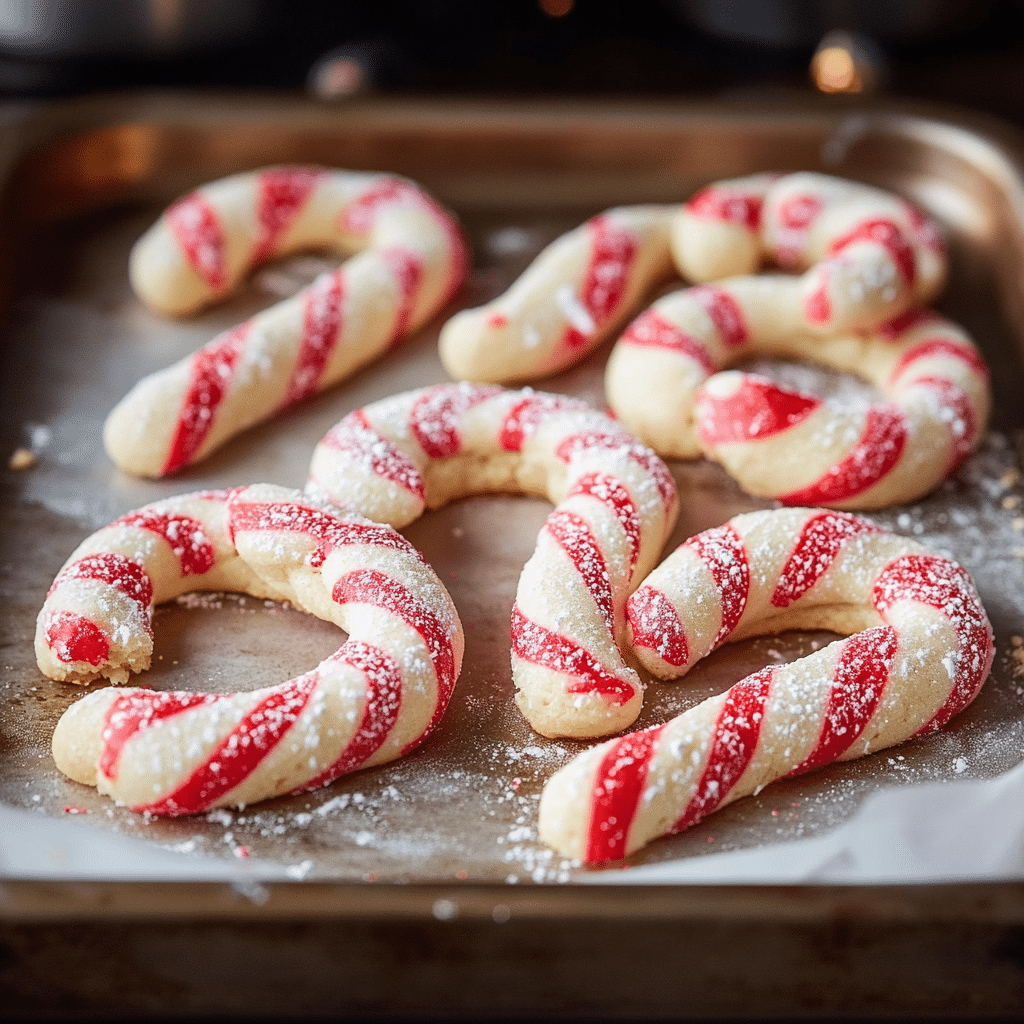
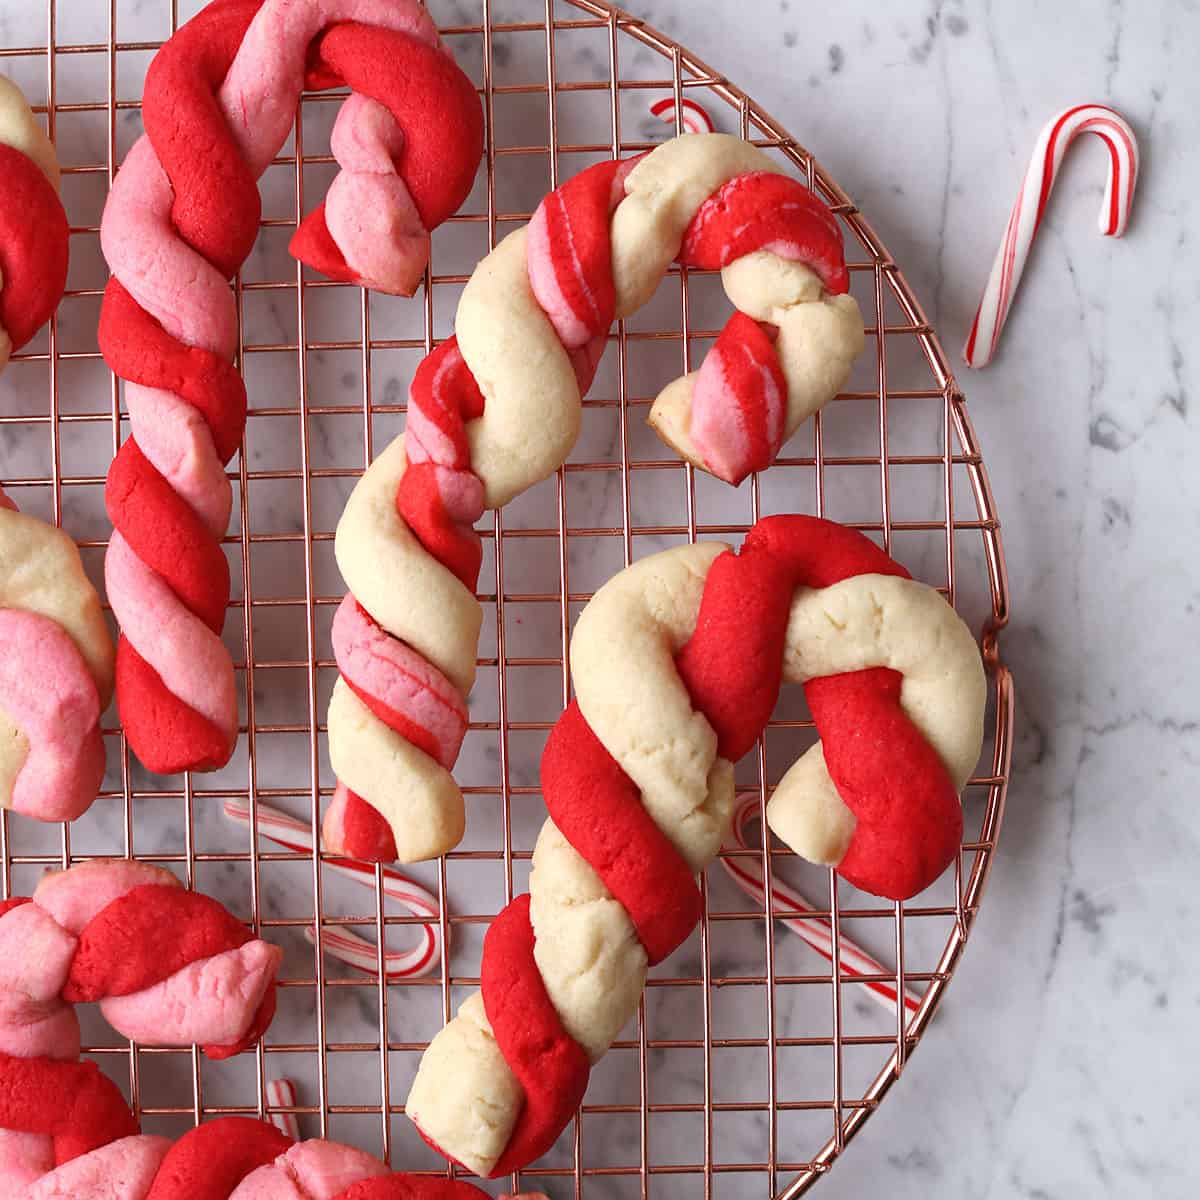
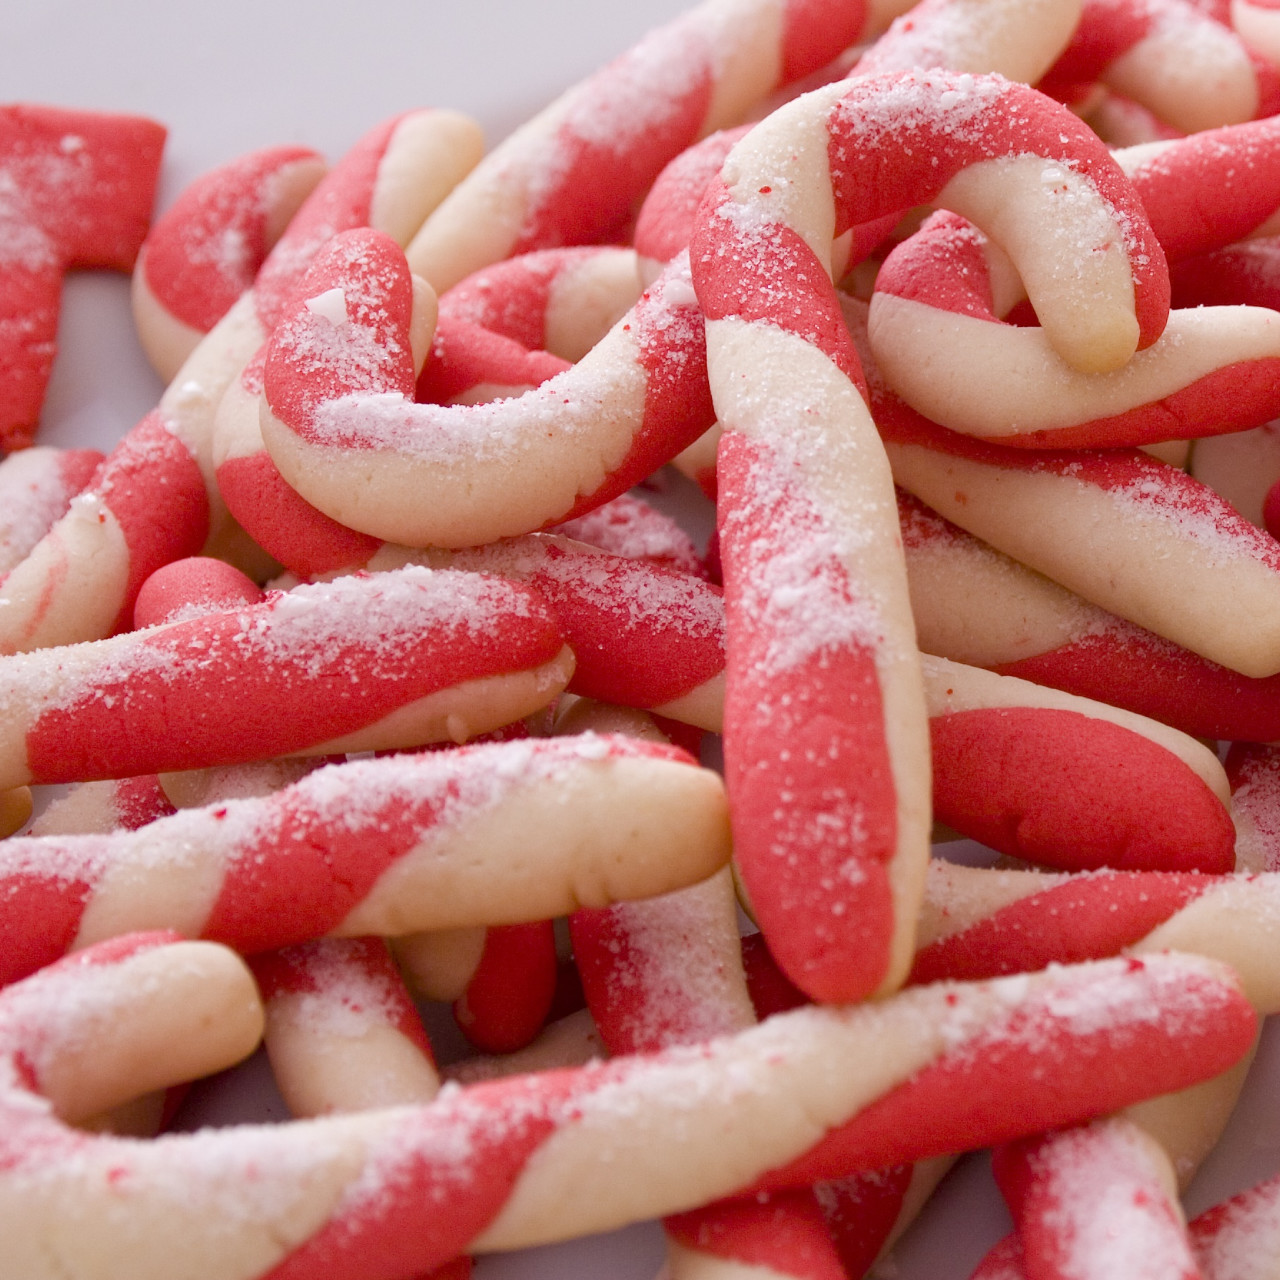
- Red and white stripes are timeless for festive cookies
- Add holly leaves, berries, or snowflake patterns
- A sprinkle of edible glitter mimics frost
Whimsical and Playful
- Animal-shaped cookies like penguins or reindeer
- Smiley faces or fun character designs
- Unconventional color palettes for a playful touch
Elegant Minimalism
- Focus on clean lines, subtle contrasts, and simplicity
- Stick to two or three colors maximum
- Use symmetry and spacing for professional appeal
Even minimalist designs can be striking when executed thoughtfully.
 |
| Playing With Texture |
Presentation Ideas That Elevate Cookies
Decorating is one part; presenting cookies effectively makes them feel special.
Decorating is one part; presenting cookies effectively makes them feel special.
1. Cookie Platters
- Arrange cookies in alternating patterns for visual interest
- Layer shapes and sizes for depth
- Add decorative elements like pine cones, greenery, or edible flowers
- Use parchment paper to separate cookies in stacks
- Tie boxes with ribbon or twine
- Add personalized tags for a thoughtful touch
3. Cookie Wreaths
- Arrange cookies in a circular pattern for a festive centerpiece
- Alternate icing colors for visual impact
- Sprinkle edible glitter for sparkle
4. Tiered Displays
- Use multi-tiered trays or cake stands to add height
- Perfect for parties or holiday gatherings
- Makes cookies the centerpiece of your dessert table
5. DIY Decorating Stations
- Set up plain cookies, icing, and toppings
- Guests can create their own designs
- Fun for children’s activities or casual get-togethers
Tips for Stress-Free Decorating
Even experienced bakers encounter challenges. Simple strategies help:
- Prep Cookies Fully – Bake, cool, and store before decorating
- Keep Icing Consistent – Adjust thickness for outlining versus flooding
- Work in Sections – Layer colors after previous ones dry
- Test Colors and Designs – Try out patterns on parchment before applying
- Embrace Imperfections – Handmade cookies have character; don’t chase perfection
- Runny Icing – Adjust slowly until the consistency is correct
- Overcrowding Displays – Give each cookie space to shine
- Skipping Drying Time – Prevents smudging of layered designs
- Poor Ingredients – Fresh butter, sugar, and flavorings improve taste and texture
- Ignoring Presentation – Think about final display from the beginning
Flavor Experiments That Work
- Peppermint, vanilla, or cinnamon for seasonal appeal
- Citrus zest for a fresh twist
- Chocolate or caramel drizzles for richness
- Incorporating nuts, sprinkles, or candy pieces for textural surprises
Advanced Techniques for Experienced Bakers
- Airbrushing – Adds shading and dimension
- Stenciling – Perfect for intricate patterns without hand-piping
- Edible Gold Leaf – Creates a luxurious, professional finish
- Marbled Icing – Swirl colors for an artistic effect
Creating an Enjoyable Decorating Experience
Decorating cookies doesn’t have to be stressful. To make it enjoyable:
- Play your favorite music while decorating
- Include kids or friends for shared fun
- Treat mistakes as creative opportunities
- Take breaks if you feel overwhelmed
- Celebrate small successes—sometimes a slightly crooked line is charming
Remember, the goal is joy, not perfection.
Making Cookie Decorating a Shared Experience
One of the most rewarding parts of decorating cookies is how it brings people together. Whether it’s a family tradition, a gathering of friends, or a holiday party, decorating sessions become memorable events. Kids often have the most imaginative ideas—unexpected color combinations, funny faces, or playful shapes. Adults can contribute finesse, trying techniques like piping rosettes or layering icing.
Creating a shared cookie-decorating activity doesn’t need to be complicated. Set up a table with bowls of icing in different colors, jars of sprinkles, and a few simple tools. Encourage participants to experiment freely. The outcome doesn’t have to be perfect; it’s the process and laughter that make it meaningful. Plus, sharing cookies afterward is the sweetest reward.
Tip: Use wax or parchment paper to catch spills and make cleanup easy. Provide aprons to prevent frosting disasters—it’s all part of the fun.
Unique Presentation Ideas
Beyond platters, boxes, and wreaths, there are several creative ways to present cookies that elevate them from simple treats to attention-grabbing delights:
Cookie Trees
Stack cookies in descending sizes on a cone-shaped base to create an edible tree. You can add a small star on top or drizzle chocolate for a snowy effect. These cookie trees make for fantastic table centerpieces.
Mason Jar Gifts
Layer cookies with different textures and colors in clear jars. Tie a ribbon around the lid and attach a handwritten note. Guests get a visually appealing gift that’s as fun to look at as it is to eat.
Hanging Ornaments
Thin cookies with a small hole at the top can double as ornaments. Thread a ribbon through, hang them on a tree, and let your guests enjoy edible decorations. This works particularly well with simple round shapes or stars.
Dessert Boards
Incorporate cookies into a larger dessert board with candies, chocolates, fruits, and nuts. Mixing textures and colors creates a visually stunning spread, making each cookie feel like part of a curated experience.
Little-Known Decorating Hacks
Sometimes, the simplest tricks make the biggest difference:
These hacks often save time while making cookies appear more intricate and professional.
- Use Toothpicks for Detail Work – Small swirls, dots, or corrections are easier with a toothpick than piping bags.
- Mix Sprinkles into Icing – Adds texture and color without extra effort.
- Chill Cookies Before Decorating – Firm cookies hold designs better and prevent smudging.
- Double-Stack Frosting for 3D Effects – Build small layers of frosting to create depth and dimension.
These hacks often save time while making cookies appear more intricate and professional.
- Planning for Large Batches-If you’re preparing cookies for a party or holiday sale, planning is key:
- Organize Ingredients and Tools – Measure ingredients beforehand, and group tools by type.
- Bake in Batches – Smaller batches help maintain cookie quality and prevent overcrowding in the oven.
- Decorate in Phases – Start with base colors, allow drying, then move to details.
Storage Between Steps – Keep cookies in airtight containers or covered trays to prevent them from drying out mid-process.
Document Your Designs – Take quick notes or photos to replicate successful patterns in future batches.
Batch planning reduces stress and ensures consistent results across dozens—or even hundreds—of cookies.
 |
| Little-Known Decorating Hacks |
Final Thoughts
Decorating cookies is more than a culinary task—it’s an art form, a social activity, and a source of joy. By combining creative techniques, thoughtful presentation, and a touch of experimentation, cookies can become more than a sweet treat—they become a centerpiece of celebration. From interactive decorating sessions to stunning gift boxes, the possibilities are endless. The key is to embrace the process, enjoy the creative freedom, and share your creations proudly.
FAQs
1. Can children safely decorate cookies?
Yes! Use pre-made icing, edible markers, and sprinkles. Avoid sharp tools and supervise for safety.
2. How long do decorated cookies last?
At room temperature, up to one week in an airtight container. Freeze undecorated cookies for longer storage.
3. Is royal icing necessary?
Not at all. Buttercream, glaze, or melted chocolate work as alternatives, depending on the desired texture.
4. How can cookies look professional without advanced tools?
Consistency, clean lines, thoughtful color choices, and layering create a polished look. Simple presentation tricks go a long way.
5. Can cookies be made in advance for holidays?
Yes. Bake ahead, store properly, and decorate closer to the event to keep them fresh and beautiful.


Comments
Post a Comment